Hay muchas formas de mostrar datos espaciales, desde los mapas tradicionales, software de GIS, y en la web. Enfrentamos ciertos desafíos para mostrar datos espaciales en la web porque requerimos ciertas funcionalidades que encontramos en un software de escritorio y ciertas herramientas de análisis espacial implementadas como botones. Django es un framework web escrito en Python que permite crear aplicaciones web con una sencillez moderada y este framework es capaz de mostrar datos espaciales vectoriales utilizando bibliotecas como Folium.
Hemos creado un tutorial con un caso aplicado que muestra información espacial hidrológica en una aplicación web en Django. El tutorial crea un proyecto de Django, genera una aplicación para la representación de datos espaciales, importa los datos vectoriales (geojson o shp) y muestra datos espaciales con estilos definidos.
Tutorial
Datos de ingreso
Puede descargar los datos de ingreso de este enlace.
Procedimiento
Este es el procedimiento completo en Windows con Anaconda:
1 - Open your Anaconda prompt and install Django and folium
pip install Djangopip install folium2 - Go to the location where you want your project to be created
3 - Create the project “geo”
4 - Move to the created directory
cd geo5 - Create the Django app “geoApp”
python manage.py startapp geoApp6 - Create the file “urls.py” inside geoApp
7 - Inside “geoApp/urls.py”, paste the following lines
from django.urls import pathfrom django.contrib.auth import views as auth_viewsfrom . import viewsurlpatterns = [ path('', views.home,name='home'), ]8 - Now we have to register this “geoApp/urls.py” inside “geo/urls.py”, add “include” to “Django.urls”
from django.urls import path, includeadd the following line to “urlspatterns”
path('',include('geoApp.urls')),You now have something like this:
from django.contrib import adminfrom django.urls import path, include urlpatterns = [ path('admin/', admin.site.urls), path('',include('geoApp.urls')), ]
9 - Inside “geoApp”:
Create a folder called “templates”
Inside “templates” create a folder called “geoApp”
10 - Before configuring the “Html” files, let´s define the “static” files and “path”. In the “/geo/settings.py”
First, at the top of the file add
import ossearch “STATIC_URL” it is located at the end of the file and replace with the following commands
STATIC_URL = '/static/'MEDIA_URL = '/media/'STATICFILES_DIRS = [ os.path.join(BASE_DIR, 'static')]MEDIA_ROOT = os.path.join(BASE_DIR, 'media')
11 - Add the folders “static” and “media” in the root folder:
12 - Inside the “static” folder, paste the folders that are inside the “static” folder given, it contains a “bootstrap” folder” and a “jquery” folder
13 - Return to “settings.py”, and in “INSTALLED_APPS” add:
'geoApp' ,
14 - Continuing in the “settings.py” file, in “DIRS” inside “TEMPLATES” add
os.path.join(BASE_DIR, 'geoApp','templates')You would have something like the following:
TEMPLATES = [ { 'BACKEND': 'django.template.backends.django.DjangoTemplates', 'DIRS': [ os.path.join(BASE_DIR, 'geoApp','templates'), ], 'APP_DIRS': True, 'OPTIONS': { 'context_processors': [ 'django.template.context_processors.debug', 'django.template.context_processors.request', 'django.contrib.auth.context_processors.auth', 'django.contrib.messages.context_processors.messages', ], }, },]
15 - Edit “/geoApp/views.py”, here we create a home function that returns to our “home.html” template, this template is created in the next step
from django.shortcuts import render, redirect# Create your views here.def home(request): context={} return render(request,'geoApp/home.html',context)
16 - Create a new file inside the new folder called “home.html”, paste this html code inside:
{% load static %} <!DOCTYPE html><html lang="en"> <head> <meta charset="utf-8"> <meta name="viewport" content="width=device-width, initial-scale=1, shrink-to-fit=no"> <meta name="description" content=""> <meta name="author" content=""> <title>GeoGida</title> <!-- Bootstrap core CSS --> <link rel="stylesheet" href="{% static '/bootstrap/css/bootstrap.min.css' %}"> </head> <body> <!-- Navigation --> <nav class="navbar navbar-expand-lg navbar-dark bg-dark static-top"> <div class="container"> <a class="navbar-brand" href="#">GeoGida</a> <button class="navbar-toggler" type="button" data-toggle="collapse" data-target="#navbarResponsive" aria-controls="navbarResponsive" aria-expanded="false" aria-label="Toggle navigation"> <span class="navbar-toggler-icon"></span> </button> <div class="collapse navbar-collapse" id="navbarResponsive"> <ul class="navbar-nav ml-auto"> <li class="nav-item active"> <a class="nav-link" href="">Welcome</a> </li> </ul> </div> </div> </nav> <!-- Page Content --> <div class="container"> <div class="row"> <div class="col-lg-12 text-center"> <h1 class="mt-5">GeoApp developed by Hatarilabs</h1> <p class="lead">You´ll be seeing shapefiles storaged in Database</p> <ul class="list-unstyled"> <li>Developed by Hatarilabs</li> <li>2020</li> </ul> </div> </div> </div> <!-- Bootstrap core JavaScript --> <script src="{% static '/jquery/jquery.slim.min.js' %}"></script> <script src="{% static '/bootstrap/js/bootstrap.bundle.min.js' %}"></script> </body> </html>
17 - Till this point go to the kernel and run your app
python manage.py runserverGo to localhost and you should be able to see the next interface:
http://127.0.0.1:8000/
18 - Now, we will add the geospatial view, to do this copy the “shp” folder of the given data to “media”, this contains two “.geojson” files
19 - Modify the “geoApp/views.py” file as follows:
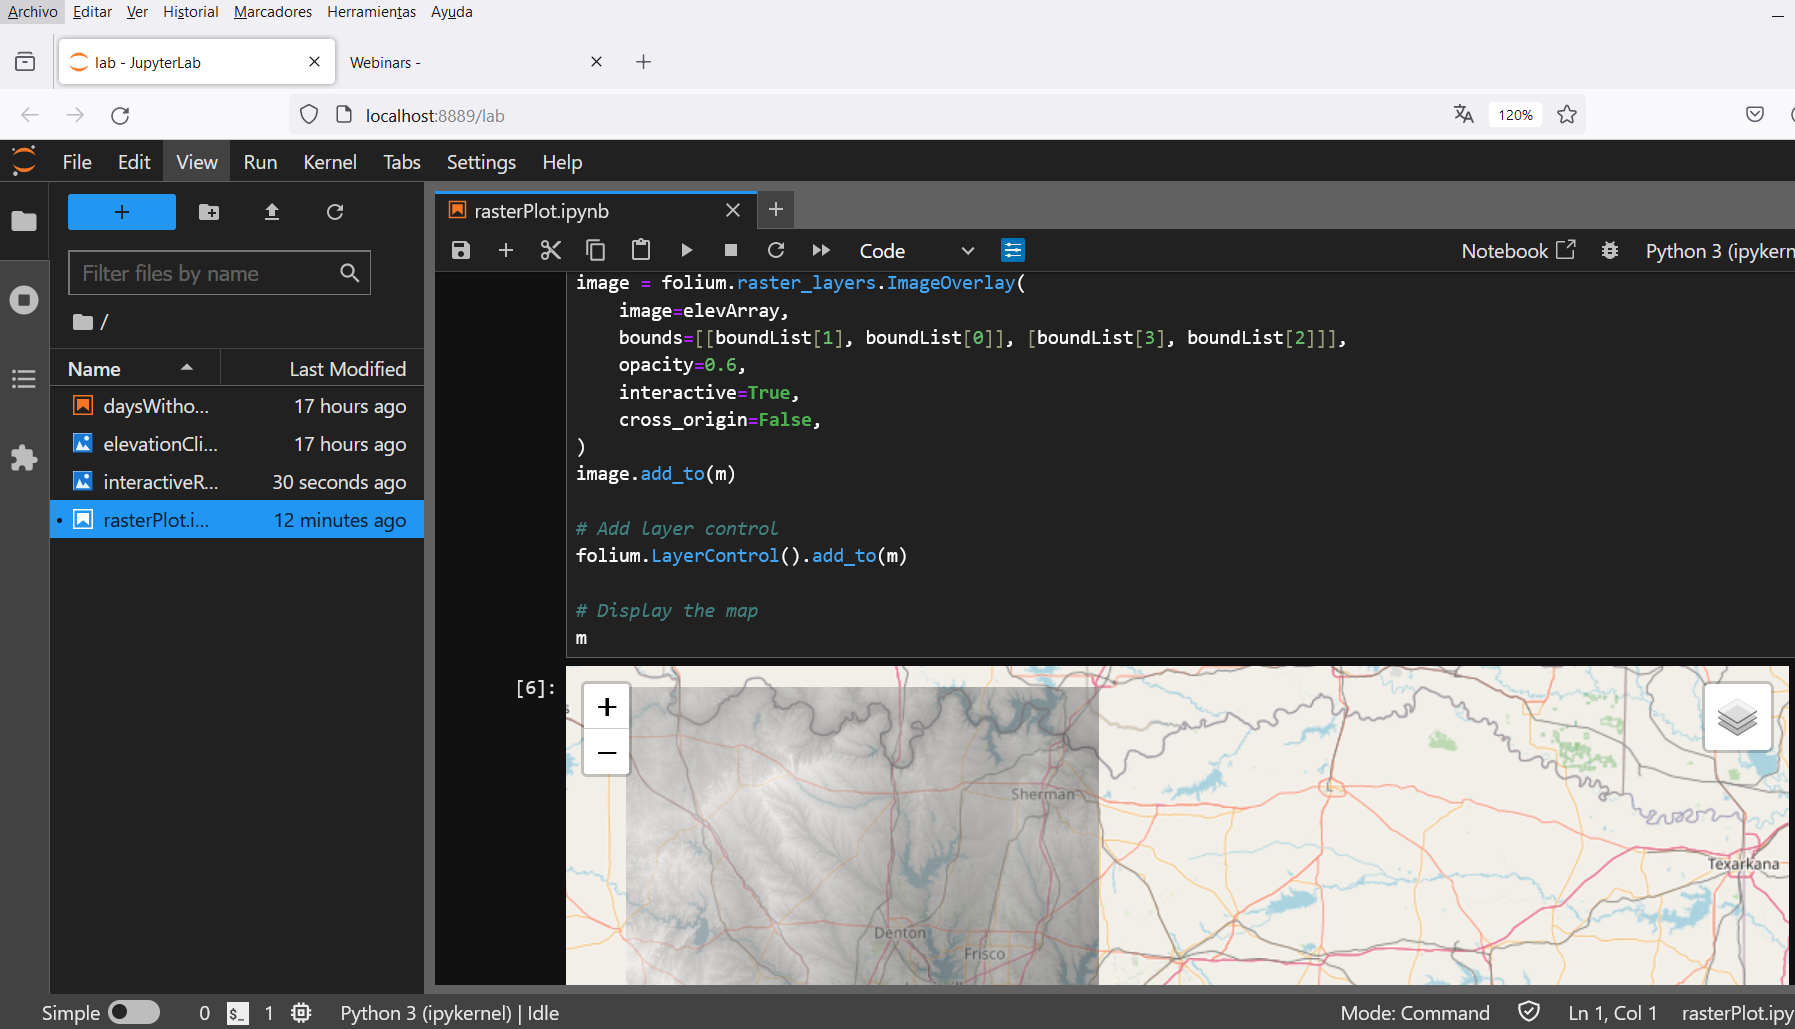
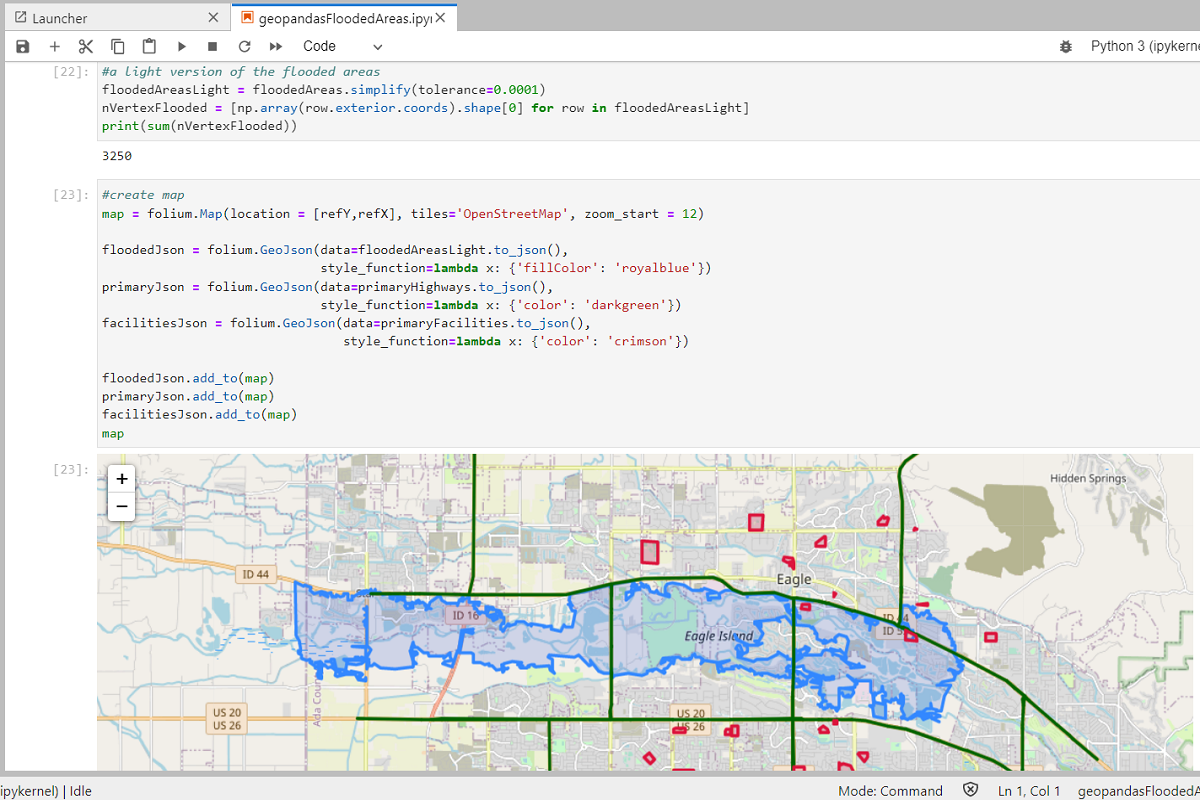
from django.shortcuts import render, redirectimport osimport folium# Create your views here.def home(request): shp_dir = os.path.join(os.getcwd(),'media','shp') # folium m = folium.Map(location=[-16.22,-71.59],zoom_start=10#) ## style style_basin = {'fillColor': '#228B22', 'color': '#228B22'} style_rivers = { 'color': 'blue'} ## adding to view folium.GeoJson(os.path.join(shp_dir,'basin.geojson'),name='basin',style_function=lambda x:style_basin).add_to(m) folium.GeoJson(os.path.join(shp_dir,'rivers.geojson'),name='rivers',style_function=lambda x:style_rivers).add_to(m) folium.LayerControl().add_to(m) ## exporting m=m._repr_html_() context = {'my_map': m} ## rendering return render(request,'geoApp/home.html',context)
20 - Now, add the map to the html code, open “home.html” an add after “<p class="lead">You´ll be seeing shapefiles storaged in Database</p>”, the following command
{{ my_map|safe }} The complete “home.html” would be as follows:
{% load static %}<!DOCTYPE html><html lang="en"><head> <meta charset="utf-8"> <meta name="viewport" content="width=device-width, initial-scale=1, shrink-to-fit=no"> <meta name="description" content=""> <meta name="author" content=""> <title>GeoGida</title> <!-- Bootstrap core CSS --> <link rel="stylesheet" href="{% static '/bootstrap/css/bootstrap.min.css' %}"></head><body> <!-- Navigation --> <nav class="navbar navbar-expand-lg navbar-dark bg-dark static-top"> <div class="container"> <a class="navbar-brand" href="#">GeoGida</a> <button class="navbar-toggler" type="button" data-toggle="collapse" data-target="#navbarResponsive" aria-controls="navbarResponsive" aria-expanded="false" aria-label="Toggle navigation"> <span class="navbar-toggler-icon"></span> </button> <div class="collapse navbar-collapse" id="navbarResponsive"> <ul class="navbar-nav ml-auto"> <li class="nav-item active"> <a class="nav-link" href="">Welcome</a> </li> </ul> </div> </div> </nav> <!-- Page Content --> <div class="container"> <div class="row"> <div class="col-lg-12 text-center"> <h1 class="mt-5">GeoApp developed by Hatarilabs</h1> <p class="lead">You´ll be seeing shapefiles storaged in Database</p> {{ my_map|safe }} <ul class="list-unstyled"> <li>Developed by Hatarilabs</li> <li>2020</li> </ul> </div> </div> </div> <!-- Bootstrap core JavaScript --> <script src="{% static '/jquery/jquery.slim.min.js' %}"></script> <script src="{% static '/bootstrap/js/bootstrap.bundle.min.js' %}"></script></body></html>